
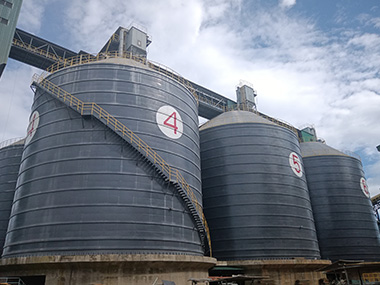

Bolted vs Welded Silo Connections: A Complete Comparison
When you're specifying a bulk storage silo for cement, clinker, fly ash, or coal, the connection method — bolted or welded — will dictate your construction timeline, long-term maintenance burden, and how the structure handles cyclic loading over 20+ years. The short answer: bolted connections win on speed and future disassembly, welded connections win on airtightness and structural continuity. Here's how to decide which one actually fits your project.
How Bolted Silo Connections Actually Work
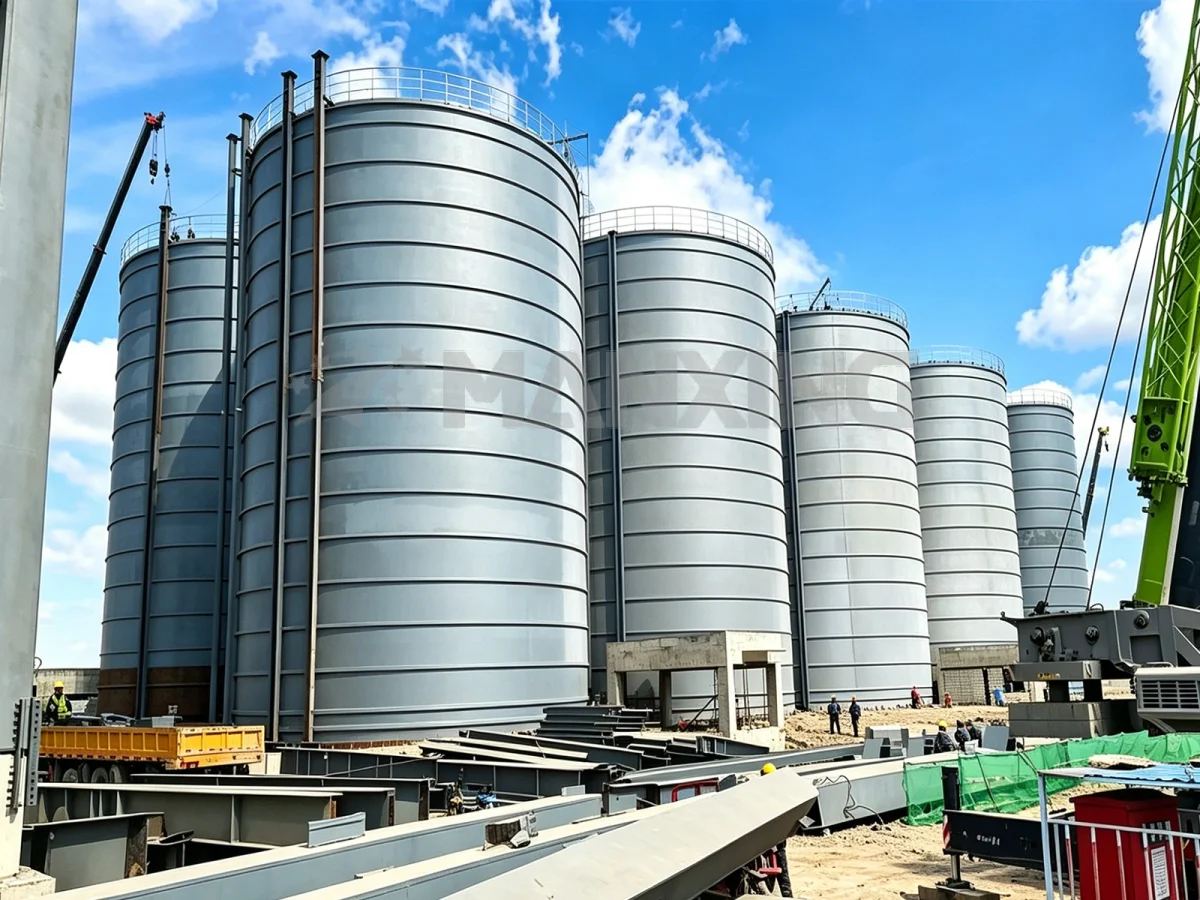
Most engineers think "bolted" means you just put bolts in holes and tighten them. That's not how industrial silo bolting works. Not even close. The real behavior depends on bolt grade, preload force, surface condition, and whether the joint is designed as slip-critical or bearing-type. Get any one of those wrong and you've got a joint that'll leak, loosen, or fail under fatigue.
Bolt Grades, Preload, and Slip-Critical Design
For structural silo shells and ring connections, you're typically looking at Grade 8.8 or 10.9 high-strength bolts conforming to EN 14399. Grade 10.9 gives you a minimum tensile strength of 1,000 MPa and yield at 900 MPa. That's the workhorse for silo work. Grade 12.9 exists — 1,200 MPa tensile — but I've never specified it for a silo shell. The embrittlement risk isn't worth it when you're dealing with cyclic pressure loads and temperature swings.
Here's the thing most people miss: a bolted joint only performs if it's properly preloaded. For slip-critical connections — and in a silo, almost every shell-to-shell and shell-to-hopper connection should be slip-critical — you need a minimum preload of 0.7 × fu × As, where fu is the bolt's ultimate tensile strength and As is the stress cross-section. For an M24 Grade 10.9 bolt, that works out to roughly 245 kN of clamping force. You can't eyeball that. You need a calibrated hydraulic torque wrench or a direct tension indicator.
The slip-critical requirement comes from EN 1993-4-1, which governs steel silo structures under Eurocode. The logic is straightforward: if the joint slips, the bolt shank bears against the hole edges, you get localized stress concentrations, and under cyclic filling and emptying — which a cement silo might see 8 to 12 times per day — you're looking at fatigue crack initiation within 3 to 5 years. I've seen it happen. A clinker silo in North Africa, M20 Grade 8.8 bolts, no preload verification. The joints started slipping after 18 months. Dust was leaking everywhere.
Assembly Sequence and Tensioning Methods
On site, the tensioning sequence matters as much as the torque value. You don't tighten bolts in a random order. You work from the center of the joint outward, in a star pattern, to ensure even gasket compression and uniform preload distribution. For large-diameter silo shell connections — say, a 30-meter-diameter cement silo with 480 bolts per ring — that sequence alone can take a two-person crew an entire day per joint.
There are three tensioning methods I've used in the field:
Torque control: Apply a calculated torque value based on the formula T = K × d × F, where K is the nut factor (typically 0.18–0.22 for galvanized surfaces), d is the bolt diameter, and F is the target preload. It's the most common method, but the nut factor varies with surface finish, lubrication, and temperature. In the field, you might see ±25% scatter in preload from torque control alone. That's why you spot-check with ultrasonic bolt tension measurement on at least 10% of bolts per ring.
Direct tension indicators (DTIs): These are washers with raised bumps that flatten as the bolt is tensioned. When the gap under the bumps reaches a specified value — usually 0.38 mm for standard DTIs — you've hit the right preload. No torque calibration needed. I prefer DTIs for silo work because they're idiot-proof. The crew doesn't need to understand torque coefficients. They just tighten until the bumps are squashed.
Hydraulic tensioning: A hydraulic stretcher pulls the bolt to the target elongation, and you spin the nut down at zero torque. This gives you the most accurate preload — ±5% scatter — but the equipment is expensive and slow. I've only used it on critical connections like silo-to-foundation anchor bolts and discharge cone supports.
Sealing and Corrosion Protection Challenges
Bolted joints leak. That's not a design flaw — it's physics. The gasket material between shell panels compresses under preload, but over time it creeps, especially at elevated temperatures. A cement silo operating at 60–80°C discharge temperature will see silicone gaskets lose 15–20% of their compression set within 2 years. You'll need to retorque the joint at the 24-month mark. Budget for it.
For corrosion protection, hot-dip galvanized bolts (per EN ISO 1461) give you 50–80 μm of zinc coating, which translates to roughly 25–40 years of protection in a C3 industrial atmosphere. In a C5 environment — coastal cement terminals, for example — you might want to go with mechanically galvanized bolts plus a zinc-rich paint touch-up on the exposed threads. I've also specified A4-80 stainless steel bolts for fly ash silos where the material's sulfur content creates a mildly acidic condensate. The cost premium is about 3× over galvanized carbon steel, but you eliminate the corrosion variable entirely.
How Welded Silo Connections Actually Work
Welding a silo shell is fundamentally different from bolting one. You're creating a monolithic steel structure — no gaskets, no slip planes, no retorquing. But you're also introducing residual stresses, heat-affected zones, and a whole set of quality control requirements that bolted construction doesn't demand. If your site welding program isn't tight, you'll pay for it in repairs, delays, and — in the worst case — structural failure.
Weld Types, Procedures, and Qualification Requirements
For silo shell circumferential and longitudinal seams, you're almost always looking at full-penetration butt welds. The shell plate thickness on a large cement silo ranges from 6 mm at the top to 20–25 mm at the bottom, where the hoop tension is highest. For plates up to 12 mm, a single-V groove with backing is standard. Above 12 mm, you're looking at double-V or double-U grooves to control distortion and reduce weld volume.
Every weld procedure needs a Welding Procedure Specification (WPS) qualified per EN ISO 15614 or AWS D1.1, depending on the project's governing code. The WPS qualification involves making test welds, cutting cross-sections for macro-etch examination, and running tensile and bend tests. A single WPS qualification for a 16 mm S355J2 shell plate with a double-V groove, using GMAW with 1.2 mm ER70S-6 wire at 220–280 amps and 26–32 volts, costs roughly $3,000–$5,000 in testing. You need one WPS per thickness range and joint configuration. For a typical silo project, that's 3 to 5 WPS qualifications.
And every welder needs to be qualified too. Per EN ISO 9606-1, a welder qualification test is valid for the thickness range and position tested, but it expires after 6 months unless the welder is working continuously and the manufacturer can verify ongoing competence. On a remote site — I'm thinking of a slag silo project in Kazakhstan where the nearest qualified welder was 400 km away — this becomes a real logistical problem. You either fly in qualified welders at $800–$1,200 per day, or you set up a qualification test on site and accept the 2-week delay.
Distortion Control and Residual Stress
Weld shrinkage is the enemy of silo shell geometry. A single 1-meter-long fillet weld on a 10 mm plate will shrink roughly 0.5–1.0 mm longitudinally and pull the plate out of flat by 1–3 mm. Multiply that by hundreds of meters of weld seam on a silo shell, and you've got a structure that's out of round by 20–40 mm. That's enough to cause uneven material flow, bridging, and rat-holing in the discharge zone.
The standard countermeasures are: balanced welding sequences (weld from the center outward, alternate sides), tack welds at 300–500 mm spacing to hold alignment, and post-weld straightening with hydraulic jacks or flame straightening. Flame straightening on S355J2 steel requires heating to 600–700°C — you can tell by the straw-brown oxide color — and controlled cooling. Do it wrong and you've altered the steel's microstructure, reducing the heat-affected zone's toughness by 30–40%. I've seen a crew in Vietnam overheat a shell section trying to straighten a 35 mm out-of-round condition. We had to cut out a 2-meter panel and re-weld it. Three days lost.
Inspection and NDT Requirements
For silo shells, EN 1993-4-1 and EN 1090-2 require a minimum of 10% ultrasonic testing (UT) or radiographic testing (RT) on full-penetration butt welds. In practice, I specify 100% UT on the bottom three shell courses — where hoop stress is highest — and 10% spot UT on the upper courses. A single UT scan on a 16 mm double-V butt weld takes about 4 minutes per meter. For a 30-meter-diameter silo with 12 meters of circumferential weld in the bottom course, that's roughly 45 minutes of scanning per ring. Not a huge time sink, but it needs to happen before the silo is painted and insulated.
The acceptance criteria per EN ISO 5817 are typically quality level B (stringent) for the bottom courses and level C (moderate) for upper courses. Level B means no cracks, no lack of fusion, and incomplete penetration limited to 10% of plate thickness. Level C allows slightly more leniency — up to 15% incomplete penetration and minor porosity up to 3 mm diameter. The cost difference between 100% UT and 10% spot UT on a single silo project is roughly $8,000–$15,000. Against a total project cost of $1.5–3 million, it's a rounding error. Don't skimp on it.
Head-to-Head: Cost, Schedule, and Structural Performance
Let's put numbers on this. I'm going to use a reference project: a 5,000-tonne cement silo, 22 meters in diameter, 32 meters high to eaves, storing OPC cement at ambient temperature. S355J2 steel, EN 1993-4-1 design, seismic zone 2A per local code.
Direct Cost Comparison (Steel, Labor, Logistics)
Bolted option: The steel weight is roughly 5–8% higher because you need thicker end plates at bolted connections and the bolt holes reduce the net cross-section. For our reference silo, that's an extra 12–18 tonnes of steel at $1,400–$1,800 per tonne (fabricated, delivered). Bolt hardware — M24 Grade 10.9, DTI washers, gaskets — adds another $15,000–$25,000. On-site assembly labor is lower: a 4-person crew can erect 8–12 tonnes per day with a mobile crane, versus 4–6 tonnes per day for welded construction. Total installed cost for the bolted silo: roughly $1.2–$1.6 million.
Welded option: Steel weight is lower — no connection plates, no bolt holes. But fabrication cost is higher because shop welding is more labor-intensive than drilling bolt holes. On-site welding adds another 20–30% to the erection labor cost. You also need NDT inspection, which adds $8,000–$15,000. Total installed cost for the welded silo: roughly $1.4–$1.9 million.
The cost difference is real but not dramatic — maybe 10–15% in favor of bolted for most configurations. Where bolted really wins is on schedule.
Schedule Impact on the Critical Path
For our reference silo, the bolted option takes 6–8 weeks from first shell panel on site to mechanical completion. The welded option takes 10–14 weeks. That 4–6 week difference comes from three factors: welding time (roughly 3× the labor hours per connection joint compared to bolting), NDT inspection (which can't be parallelized with welding — you have to scan before you can paint), and weather sensitivity. Welding in rain or below 5°C requires preheat to 150–200°C and wind shields, which slows everything down. Bolting in rain? You just put on a rain jacket and keep going.
I remember a project in Malaysia — two identical 3,000-tonne fly ash silos, one bolted, one welded, same site, same crew. The bolted silo was ready for commissioning 5 weeks before the welded one. The client didn't care about the technical nuances. They cared that they could start production 5 weeks earlier. That's worth $200,000–$400,000 in revenue for a typical cement terminal.
Structural Behavior Under Cyclic and Seismic Loading
Under static vertical load — the weight of the stored material — both connection types perform identically if designed correctly. The difference shows up under cyclic loading (filling and emptying) and seismic loading.
Cyclic loading: A slip-critical bolted joint, properly preloaded, behaves essentially like a monolithic connection under service loads. The friction between the faying surfaces carries the shear, and the bolt never sees bearing stress. But if the preload relaxes — and it will, by 5–10% over the first 2 years due to embedment and gasket creep — the joint can transition to bearing-type behavior, and fatigue becomes a concern. EN 1993-1-9 gives a fatigue detail category of 71 MPa for preloaded bolts in shear, which is adequate for most silo applications with fewer than 200,000 load cycles over the design life. A welded butt weld, properly inspected, has a detail category of 90 MPa — better, but not dramatically so.
Seismic loading: Here's where welded connections have a clear advantage. A continuous welded shell distributes seismic forces evenly through the structure. Bolted joints, even slip-critical ones, have a small amount of slip under extreme overload — typically 0.5–1.0 mm at the serviceability limit state. In a seismic event, that slip can act as a fuse, preventing brittle fracture but causing permanent deformation. For high seismic zones — say, Zone 3 or 4 per EN 1998 — I'll specify welded shells for the bottom 40% of the silo height and bolted for the upper sections. Best of both worlds.
When to Choose Which — A Practical Decision Framework
I've been asked this question on probably 50 projects. The answer isn't always the same, but the decision tree is consistent.
Project Factors That Favor Bolted Construction
Schedule pressure: If the silo is on the critical path and you need it operational in under 12 weeks from start of erection, bolted is almost always the answer. The 4–6 week schedule advantage is hard to overcome with overtime or additional crews on a welded silo.
Remote sites with limited skilled labor: Finding qualified welders in Central Africa, Central Asia, or the Australian outback is expensive and slow. A bolted silo can be erected by a general steel erection crew with a competent supervisor. You don't need EN ISO 9606-qualified welders. You need a torque wrench and a DTI.
Future disassembly or relocation: If there's any chance the silo will need to be moved — mining projects with 10–15 year mine lives, temporary cement terminals, leased sites — bolted construction is the only practical option. You unbolt it, truck it, re-erect it. A welded silo is a permanent structure. Cutting it apart for relocation destroys 30–40% of the steel.
Large diameters (>25 m): For very large silos, the shell plate thickness at the bottom can exceed 25 mm. Welding 25 mm plate requires preheat to 150–200°C, controlled interpass temperatures, and post-weld heat treatment in some cases. That's slow, expensive, and quality-sensitive. Bolted connections avoid all of that.
Project Factors That Favor Welded Construction
Airtightness requirements: If you're storing a material that must be kept absolutely dry — soda ash, certain chemical powders, or food-grade materials — a welded shell is inherently airtight. A bolted shell with gaskets will always have some leakage, especially as gaskets age. For a soda ash silo I worked on in Shandong, even 0.5% air infiltration was unacceptable because it caused caking. Welded shell, full-penetration seams, 100% UT. No discussion.
High seismic zones: As I mentioned above, welded shells distribute seismic forces more evenly. In Zone 3 or 4, I'll specify welded construction for the lower shell courses at minimum.
Aggressive stored materials: Some materials — wet fly ash, coal with high sulfur content, certain slags — create a corrosive environment inside the silo. Bolted joints have crevices where moisture can collect and cause crevice corrosion. A welded shell, properly sealed with internal coating, eliminates those crevices.
Small silos (<10 m diameter): For small silos, the schedule advantage of bolting disappears. The erection time difference is maybe 1–2 weeks, and the welded silo's airtightness and structural continuity are worth more than the schedule savings.
Hybrid Approaches — Getting the Best of Both
This is what I actually recommend on most projects. Weld the bottom 3–4 shell courses (where hoop stress is highest and seismic demands are greatest), and bolt the upper courses (where stress is lower and schedule savings matter). The transition is a bolted ring flange at the top of the welded section. It adds one extra joint, but you get the structural continuity where you need it and the erection speed where you don't.
Another hybrid: weld the shell, bolt the roof. The roof structure — rafters, ring beams, deck plate — is almost always bolted, regardless of the shell connection type. There's no structural benefit to welding roof rafters to the top ring, and bolting them makes future maintenance and replacement much easier.
Failure Modes We've Seen in the Field
I'll be blunt: most silo connection failures I've investigated were preventable. They weren't caused by the connection type itself — they were caused by poor execution, inadequate inspection, or a design that didn't account for the actual operating conditions.
Bolted Connection Failures
Under-torquing: The most common failure mode. A crew tightens bolts with an impact wrench instead of a calibrated torque wrench, and the preload is 40–60% of the design value. The joint slips under load, the bolts go into bearing, and fatigue cracks initiate at the hole edges. I've seen this on a coal silo in Indonesia — M20 Grade 8.8 bolts, supposed to be torqued to 450 Nm, actually torqued to about 200 Nm. The joint started leaking coal dust within 6 months. We had to retorque every bolt on the silo — 2,400 bolts — over 3 days.
Gasket failure: Using the wrong gasket material for the operating temperature. A neoprene gasket rated for 80°C will harden and crack at 120°C. For cement silos with hot clinker dust, you need a silicone or PTFE gasket rated to 200°C+. The cost difference is maybe $2 per linear meter of gasket. Not worth the risk.
Corrosion at bolted joints: If the bolt heads and nuts aren't properly coated after installation — zinc-rich paint or a cold-galvanize compound — the exposed steel will corrode, especially in humid environments. I've seen bolt heads lose 2–3 mm of section after 10 years in a coastal environment. That's a 30–40% reduction in clamping force.
Welded Connection Failures
Lack of fusion: The most dangerous weld defect in a silo shell. It's a planar defect — essentially a crack — that can propagate under cyclic loading. It's also the hardest to detect with UT if the defect orientation is unfavorable. I specify 100% UT plus 10% RT on the bottom shell courses specifically to catch lack-of-fusion defects that UT might miss.
Brittle fracture: S355J2 steel has adequate toughness down to -20°C (27 J Charpy V-notch). But if the weld procedure produces a coarse-grained heat-affected zone with reduced toughness — which happens with excessive heat input above 2.5 kJ/mm — the effective toughness can drop below 10 J. At that point, a small defect can trigger brittle fracture at stresses well below yield. This is why EN 1090-2 requires impact testing on welds for steel thicknesses above 25 mm in structures subject to low temperatures.
Fatigue cracking at hopper-to-shell junctions: The hopper-to-shell junction is the highest-stress area in any silo. The geometric discontinuity creates a stress concentration factor of 2.0–3.0. If the weld at this junction has any defects — undercut, porosity, incomplete penetration — fatigue cracks will initiate within 2–5 years of operation. I've seen a 4,000-tonne clinker silo develop a 150 mm crack at the hopper weld after 3 years. The repair required emptying the silo, cutting out the cracked section, and re-welding with a qualified procedure. Total cost: $80,000 and 3 weeks of downtime.
Case Study — Fly Ash Silo, 2022
A power plant in southern China needed a 2,000-tonne fly ash silo. The site was tight — the silo had to fit between an existing conveyor structure and a baghouse, with only 4 meters of clearance on one side. The client wanted a welded shell for airtightness (fly ash is hygroscopic and cakes if it absorbs moisture), but the schedule was 14 weeks from contract signing to commissioning.
We proposed a hybrid: welded bottom 4 courses (12 meters of shell height), bolted upper 8 courses. The welded section was fabricated in our workshop — 4 courses, pre-assembled, 100% UT, painted — and shipped to site in two sections. The bolted upper courses were shipped as individual shell panels with pre-drilled bolt holes and pre-installed gaskets.
Erection took 9 weeks. The welded bottom section went up in 5 weeks (two crane picks, field welding the circumferential seam between the two sections). The bolted upper section went up in 4 weeks with a 4-person crew and a 25-tonne mobile crane. Total project cost was $680,000 — about 12% less than a fully welded silo would have been, and 3 weeks ahead of the fully welded schedule.
The retorque program at 6 months showed 8% of bolts had lost more than 10% of preload. We retorqued those and added a second retorque at 18 months. At the 24-month inspection, preload loss was under 5% across all joints. The silo's been running for 2 years with zero dust leakage.
FAQ
Q: Can a bolted silo be as airtight as a welded one?
Not quite. A welded shell with full-penetration seams and 100% NDT is inherently airtight — there are no joints to leak. A bolted shell with gaskets will always have some leakage, typically 0.1–0.5% of the silo's air volume per day under normal operating conditions. For most bulk materials — cement, clinker, coal, slag — that's acceptable. For hygroscopic or toxic materials, you need a welded shell or a bolted shell with a secondary seal (continuous external weld over the gasket joint, which defeats the purpose of bolting).
Q: What's the design life difference between bolted and welded silos?
Both can achieve a 25–30 year design life if properly maintained. The difference is in the maintenance burden. A bolted silo needs gasket replacement every 8–12 years and bolt retorquing every 2–3 years. A welded silo needs periodic shell thickness measurement (ultrasonic testing at 5-year intervals) and coating maintenance, but no joint maintenance. Over 25 years, the total maintenance cost for a bolted silo is roughly 15–20% higher than for a welded one.
Q: Is it possible to convert a welded silo to bolted, or vice versa?
Not practically. The shell plate edge preparation is fundamentally different — welded shells need beveled edges for the weld groove, bolted shells need drilled bolt holes at specific pitch and edge distances. You can add bolted reinforcement to a welded shell (external stiffening rings, for example), but you can't convert the primary shell seams from one type to the other without replacing the shell plates entirely. If you're unsure which connection type to choose, design the shell plates with both options in mind — drill bolt holes but leave the edges unbeveled. That gives you the option to bolt or weld during fabrication, at a cost premium of about 5–8% for the additional plate preparation.
Need help specifying your silo connections?
Manxing has designed and built over 300 industrial silos across 30+ countries — cement, clinker, fly ash, coal, slag, and more. We'll run the numbers on your specific project: material properties, seismic zone, operating temperature, schedule constraints, and budget. No generic recommendations. Just engineering.
Contact our silo engineering team: manxingstorage.com — or send your project parameters directly for a preliminary connection recommendation within 48 hours.