
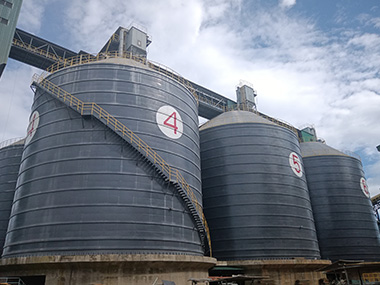

Weather Damage Prevention and Repair for Industrial Silos: What 15 Years of Field Work Actually Teaches You
Weather kills silos slowly, then all at once. The two things that'll save your structure? A coating system specified for your actual environment — not the one that looks good on a datasheet — and a drainage design that assumes the worst storm on record will hit next Tuesday. Everything else is details.
1. Corrosion: The Quiet Killer That Doesn't Care About Your Schedule
Most silo owners I've worked with think corrosion is a maintenance issue. It's not. It's a design issue that shows up as a maintenance problem ten years later when someone notices the wall thickness has dropped from 8mm to 5.2mm and suddenly the whole structure needs a reassessment.
1.1 Why Standard Coating Specs Fail in Real Environments
Here's a number that'll make your paint supplier uncomfortable: in coastal industrial zones within 5km of open water, the actual corrosion rate for unprotected carbon steel runs 0.12–0.18mm per year. That's double what most generic coating specifications assume. I've measured it myself — pulled an ultrasonic thickness gauge out of my bag on a silo in southern Vietnam and watched the plant manager's face when I showed him 3.4mm remaining on a wall that was originally 10mm.
The problem is that most coating specs are written for "moderate industrial" environments. But your cement plant in Gujarat isn't moderate. It's 90% humidity for four months straight, salt-laden air, and surface temperatures that hit 65°C on the south-facing wall. That's C5-M under EN ISO 12944 — very high corrosivity, marine. You need a system build-up of at least 320μm dry film thickness: zinc-rich epoxy primer at 75μm, epoxy intermediate coat at 150μm, polyurethane finish at 95μm. Anything less and you're repainting in five years instead of twelve.
1.2 The Roof-to-Wall Junction Nobody Seals Properly
If I had to pick one spot where weather gets into a silo, it's the roof-to-wall connection. Not the obvious places — the manholes, the inlet chutes — but the actual annular seam where the cone roof meets the cylindrical shell. Thermal movement opens this joint 3–8mm over a 20-year service life. Most sealants rated for ±25% movement can handle that. But the ones actually installed by crews working at height in 38°C heat? I've seen polysulfide sealant applied so thin you can see the steel through it.
We specify a dual-seal system now: primary EPDM gasket compressed to 60% of free thickness, secondary silicone weatherseal rated for ±50% movement with a minimum 15mm bead depth. On a 15m-diameter silo, that's roughly 47 linear metres of joint. It costs maybe ¥12,000 in materials. The alternative is water inside your silo, and wet cement or wet fly ash is a nightmare you don't want.
1.3 Bolted Panel Joints in Monsoon Climates
Bolted steel silos are great for fast construction. In monsoon climates, they're a headache. Every panel joint is a potential leak path, and gasket compression degrades faster than you'd expect. I was on a project in Bangladesh where the plant had been running for three years. First heavy monsoon of the season, and fly ash started weeping out of panel joints at the 8m elevation band. Not leaking — weeping. Like the silo was sweating. Turned out the neoprene gaskets had taken a compression set of about 40% after three years of thermal cycling. They'd lost their resilience.
We replaced them with EPDM gaskets rated for 15-year compression set resistance below 25%. Cost about ¥35,000 for the whole silo. The plant manager told me the lost product from those three years of weeping was worth more than the gasket replacement. He wasn't exaggerating — I did the math later. At 200 tonnes of fly ash stored and maybe 0.3% annual loss through the joints, that's 1.8 tonnes over three years. Doesn't sound like much until you factor in the cleanup, the conveyor contamination, and the environmental fine they got.
2. Wind Loading: When the Atmosphere Tries to Push Your Silo Over
Wind doesn't just push. It creates vortices, generates negative pressure on the leeward side, and on a tall thin structure like a silo, it can induce ovalling — the cross-section deforms into an ellipse and back again. Do that a few million times over 20 years and you get fatigue cracks at the stiffener connections.
2.1 Design Wind Speed vs. Actual Wind Speed — The Gap That Matters
EN 1991-1-4 gives you a methodology for calculating wind actions on structures. Most silo designers use the basic wind speed maps from the relevant national annex. But here's the thing — those maps give you a 50-year return period value. In typhoon zones, the 50-year gust can exceed 60 m/s. At that speed, the external pressure coefficient on a cylindrical shell (Cpe = -2.0 under suction) generates a net inward pressure of roughly 2.2 kPa. On a silo with a 12m diameter and 30m height, that's an overturning moment that'll make your foundation designer reach for another coffee.
I worked on a project in the Philippines where the original design used a 45 m/s basic wind speed. Typhoon season hit, and the silo survived — but the anchor bolts showed measurable elongation on the windward side. Post-event inspection found three bolts at 15% beyond yield. We replaced all 48 anchor bolts with higher-grade 8.8 steel and increased the bolt circle diameter by 200mm. The silo's still standing. The lesson? In typhoon zones, design for the 100-year return period, not the 50-year. The cost difference in the foundation is maybe 8–12%. The cost of a silo on its side is, well, everything.
2.2 Vortex Shedding and Silo Ovalling
This is the one that surprises people. A tall, slender silo — say, height-to-diameter ratio above 2.5 — can experience resonant ovalling when wind generates alternating vortices at a frequency that matches the shell's natural frequency. The shell breathes. In. Out. In. Out. At maybe 1–2 Hz.
The critical wind speed for ovalling is roughly: Vcr = (f × D) / St, where f is the natural frequency, D is diameter, and St is the Strouhald number (about 0.2 for a cylinder). For a typical 8m-diameter, 25m-tall cement silo, the first ovalling mode frequency is around 1.8 Hz. That puts Vcr at roughly 72 m/s. Above most design wind speeds, but not all — and the second and third ovalling modes kick in at lower wind speeds.
The fix is ring stiffeners. We typically space them at 2.5–3.0m intervals on slender silos. Each stiffener is a steel angle or channel welded to the exterior shell, increasing the local moment of inertia by a factor of 5–8. It's not expensive — maybe ¥80,000–¥150,000 for a full set on a 30m silo. But it moves those ovalling frequencies well above the critical wind speed range.
2.3 Discharge Outlets and Appurtenances — The Wind Catchers
Anything that sticks out off a silo — a ladder, a platform, a pneumatic conveying pipe, a bin activator — acts as a wind catcher. The local wind load on a horizontal pipe at 20m elevation can be 3–4 times the load on the shell surface. I've seen platform support brackets crack at the weld toe because the designer calculated the platform dead load and live load but used a wind coefficient for flat surfaces instead of cylindrical ones.
For cylindrical appurtenances, use a shape factor of 0.7–1.0 depending on surface roughness, not the 1.2 you'd use for a flat plate. And check the connection detail at the shell — that's where the crack starts. I recommend full-penetration welds for any bracket carrying more than 2kN of lateral load, with a minimum 10mm fillet if you're sticking with fillet welds.
3. Thermal Cycling: The Damage You Can't See Until It's Expensive
A silo in the Saudi desert sees a 30°C temperature swing between day and night. In Inner Mongolia, it's 40°C between summer and winter. That expansion and contraction cycles every day, every year, for decades. The steel handles it — steel's elastic limit is generous. But the connections, the coatings, and the stored material don't all respond the same way.
3.1 Shell Expansion and Foundation Interaction
A 15m-diameter steel silo heated by 30°C expands by roughly 5.6mm in circumference. That doesn't sound like much, but the foundation doesn't expand with it — it's concrete, buried in soil, thermally stable. So the base of the shell has to accommodate that differential movement.
For welded silos, the shell base detail needs to allow radial movement. We use a sliding base connection — a steel ring anchored to the foundation with the shell sitting on a layer of graphite-impregnated PTFE. Friction coefficient: 0.05–0.10. That means for a silo with 800kN of vertical load at the base, the horizontal friction force is only 40–80kN. The shell can slide. The foundation doesn't care.
For bolted silos, the base bolts should be in slotted holes with a minimum 10mm oversize to allow movement. I've seen rigid base connections where the thermal stress actually lifted the foundation ring by 2mm on the south-facing side during afternoon heat. The anchor bolts were in shear, the grout was cracking, and the whole thing was a mess waiting to happen.
3.2 Coating System Flexibility Requirements
Standard epoxy coatings have a coefficient of thermal expansion around 50–70 × 10⁻⁶ /°C. Steel is 12 × 10⁻⁶ /°C. That mismatch means the coating is constantly in tension during cooling and compression during heating. Over 10,000 thermal cycles, microcracks develop. Water gets in. Corrosion starts under the coating — which is worse than corrosion on bare steel because it's hidden.
For environments with daily temperature swings above 20°C, I specify a flexible polyurethane finish coat with elongation at break above 150%. The epoxy intermediate stays — you need the barrier properties — but the topcoat has to move with the steel. Cost premium is about 15–20% over standard alkyd or acrylic finishes. Worth every cent when you're not scaffolding the whole silo for a recoat in year seven.
3.3 Material Bridging from Thermal Moisture Migration
This one's sneaky. In a fly ash or cement silo stored in a climate with large day-night temperature swings, moisture migrates from the warm side of the silo wall to the cool side. During the day, the sun heats the south-facing wall. Moisture in the stored material evaporates, migrates inward, and condenses on the cooler north-facing wall. Over time, you get a hardened crust of material on the inside of the north wall. I've seen crusts up to 150mm thick on a 20m-tall silo. That's not just a flow problem — it's an asymmetric load on the shell that the structure wasn't designed for.
The fix is insulation. A 50mm layer of mineral wool on the exterior shell, clad with 0.6mm aluminum sheeting, reduces the temperature differential across the wall from 25°C to under 5°C. Material cost for a 15m-diameter, 20m-tall silo: roughly ¥180,000–¥250,000. It pays for itself in reduced bridging events, less manual cleaning, and lower risk of asymmetric loading.
4. Water Ingress at the Base: Where Most Silos Actually Die
The top of a silo gets all the attention — roof hatches, vent filters, lightning protection. But the base is where water does the most damage. Pooling water at the foundation ring, inadequate drainage, and capillary action through the concrete foundation all conspire to corrode the shell from the bottom up.
4.1 Foundation Drainage Design That Actually Works
The standard detail shows a concrete ring beam with a slight outward slope. That's fine for a structure that doesn't store 2,000 tonnes of bulk material. What actually happens is the foundation settles — not uniformly, never uniformly — and you get a low point where water collects. That low point is usually on the side where the soil was a bit softer, or where the backfill wasn't compacted properly. I've measured 80mm of standing water against a silo base after a moderate rainstorm. The shell bottom was submerged for three days.
Here's what we do now: a 150mm-wide, 75mm-deep drainage channel cast into the concrete pad around the silo base, sloped at 1:50 to a collection sump. The channel connects to the site stormwater system. Total additional cost: maybe ¥15,000–¥25,000 on a typical foundation. The alternative is replacing the bottom 1.5m of shell plate at year twelve. That's ¥200,000–¥400,000, plus scaffolding, plus production downtime.
4.2 The Base Angle Detail — Seal It or Lose It
The base angle that connects the shell to the foundation is a corrosion trap. Dirt accumulates against it. Water sits in the gap. The underside of the angle — where it meets the concrete — is impossible to paint after construction. I've seen base angles with 60% section loss after eight years in a humid climate.
We specify a continuous fillet weld on both sides of the base angle (minimum 8mm leg length), a bituminous sealant strip between the angle and the concrete, and a sacrificial anode system for silos in aggressive environments. The cathodic protection system costs about ¥40,000–¥60,000 installed and lasts 15–20 years. It protects the base angle, the anchor bolts, and the bottom ring of shell plate. In my book, it's mandatory for any silo within 10km of the coast or in an area with soil resistivity below 5,000 Ω·cm.
4.3 Flood Risk Assessment for Silo Foundations
This is the one that keeps getting ignored. A silo in a flood zone isn't just about the silo — it's about buoyancy. An empty 3,000-tonne-capacity silo weighs maybe 80–120 tonnes structural steel plus 50–80 tonnes of concrete foundation. That's 130–200 tonnes total. Displaced water from a 2m flood depth on a 15m-diameter footprint is roughly 350 tonnes. Your empty silo will float. I'm not being theoretical — I've seen grain silos (smaller, lighter) displaced 40m by floodwater in a project in central China. They were empty at the time, which is exactly when the risk is highest.
For silos in flood-prone areas, the foundation needs either sufficient dead weight to resist buoyancy (a thicker concrete mat, maybe 800mm instead of 400mm) or a tie-down system with micropiles. We typically design for a 1-in-100-year flood level plus 500mm freeboard. The cost of a flood-resistant foundation is 20–30% more than a standard one. The cost of a silo that's floated into the neighbouring property is incalculable.
5. Inspection and Repair: What to Do When Weather Has Already Done Its Work
You can't prevent everything. Hail damages cladding. A typhoon exceeds the design case. A coating system fails prematurely because the surface prep was rushed. When damage happens, the question isn't whether to repair — it's how to repair so the same thing doesn't happen again in three years.
5.1 Corrosion Repair — Patching vs. Recoating
Spot repair of corroded areas works if the corrosion is localised — say, a 200mm² area where the coating was damaged during installation. You clean to Sa 2.5 (ISO 8501-1), apply the same coating system in layers, and you're done. But if the corrosion is widespread — more than 25% of the surface showing rust — spot repair is a waste of money. You'll be back in two years doing it again.
For widespread corrosion, full recoating is the answer. But here's the critical step nobody budgets for: surface preparation. Sa 2.5 blast cleaning on a 30m-tall silo with 700m² of surface area takes a crew of six about 10–12 days. The abrasive cost alone is ¥30,000–¥50,000. Skip it, and your new coating system fails at the interface with the old steel in 3–5 years. I've seen it happen. The coating looks great for two years, then it starts peeling in sheets. Because the surface was hand-tool cleaned instead of blast cleaned, and the anchor profile was 20μm instead of the 50–75μm the coating manufacturer specified.
5.2 Structural Repair After Extreme Wind Events
After a typhoon or severe storm, the inspection protocol should be: visual survey first, then ultrasonic thickness measurement on any areas showing deformation, then bolt torque check on all anchor bolts (minimum 10% sample, 100% if any are found loose). The acceptance criterion for anchor bolt torque is ±10% of the design value. For an M30 Grade 8.8 bolt, that's typically 1,200–1,400 Nm depending on the lubrication specification.
If the shell shows ovalling deformation — measure it with a total station at eight points around the circumference — the acceptance criterion is ±0.5% of diameter. For a 12m silo, that's ±60mm. Beyond that, you're in structural assessment territory. We've repaired ovalled silos by installing internal ring stiffeners — essentially the same as external ones but welded to the interior surface. It's messy work in a confined space, but it restores the shell's resistance to further ovalling and adds a safety margin.
5.3 Emergency Repairs During the Rainy Season
Sometimes you can't wait for dry weather. A leak in the roof during monsoon season means water entering the silo, and if you're storing cement or fly ash, that's a product quality emergency. We keep a stock of emergency repair materials: fast-cure polyurethane sealant (touch-dry in 30 minutes at 25°C), patching compound for roof penetrations, and temporary clamping bands for leaking panel joints.
The clamping band is the one that saves the day. It's a stainless steel band — 100mm wide, 1.5mm thick — that wraps around the silo at the leak point with a neoprene gasket underneath. You tension it with a worm-gear clamp. It stops the leak in 20 minutes and stays in place until you can do a proper repair in dry weather. We've used them on bolted silos in Malaysia, Indonesia, and Vietnam. Total cost per band: about ¥800. I keep six in my project vehicle at all times.
A plant manager in Fujian called me at 3am during a typhoon. His cement silo was making a sound — a low, rhythmic groaning every 8–10 seconds. He thought the structure was failing. I walked him through it on the phone: it was vortex shedding, the shell was ovalling at its natural frequency, and the sound was the panel joints flexing. I told him to check the wind speed (he had a site weather station — 38 m/s, gusting to 45). Below design wind speed. The silo was fine. But I told him to inspect the anchor bolts in the morning. Three were at 80% of design torque. We retensioned them that day. The groaning stopped when the wind dropped below 30 m/s. The lesson? Know your silo's natural frequency. If you hear rhythmic noise during high wind, it's probably ovalling — not structural failure. But check those bolts regardless.
Case Study: Coastal Fly Ash Silo — Coating Failure and Full Recovery
Location: Industrial zone, 3.2km from coastline, Fujian Province, China
Structure: 12m diameter × 28m high bolted steel silo, 1,500-tonne fly ash capacity
Problem: After four years of service, widespread corrosion on exterior shell. Coating failure at panel joints, bolt heads, and base angle. Measured steel loss: 0.3–0.8mm on 6mm shell plates in the worst areas.
Root cause: Original coating system was a single coat of alkyd paint at 80μm DFT. Specified for "industrial environment" without coastal corrosion classification. Surface preparation was wire-brush cleaning, not blast cleaning. No maintenance recoating in four years.
Repair scope: Full exterior blast cleaning to Sa 2.5 (ISO 8501-1), application of three-coat system: zinc-rich epoxy primer 80μm, epoxy intermediate 160μm, polyurethane finish 100μm (total DFT 340μm, EN ISO 12944 C5-M compliant). Replacement of 47 corroded bolts (Grade 8.8, M20 × 60). Base angle repair: removed corroded sections, welded new steel, applied bituminous sealant.
Cost: ¥285,000 total, including scaffolding, materials, and labour. Duration: 18 working days.
Expected service life of repair: 12–15 years before first maintenance recoating.
Key takeaway: The original coating system cost maybe ¥45,000. The repair cost ¥285,000. If they'd spent ¥120,000 on the correct coating system at construction, they'd have saved ¥165,000 and four years of corrosion damage. This is the math that makes coating specifications a capital expenditure decision, not a maintenance decision.
Frequently Asked Questions
Q: How often should I inspect my silo's exterior coating system?
Annually for the first five years, then every two years after that if no degradation is found. In coastal or high-humidity environments, stick to annual inspections. The inspection doesn't need to be elaborate — visual survey from ground level with binoculars, plus a close-up inspection of the base angle, roof-to-wall junction, and any areas where water runs down the shell. Budget 4–8 hours per silo for a competent inspector. If you find coating breakdown exceeding 10% of surface area, schedule a recoating within 12 months.
Q: My silo is in a typhoon zone. Should I install wind monitoring equipment?
Yes. A site weather station with anemometer (wind speed and direction), barometer, and data logging costs ¥8,000–¥15,000 installed. Set an alarm threshold at 75% of your design wind speed. When the alarm triggers, you have maybe 30–60 minutes before peak winds. That's enough time to stop feeding operations, close inlet valves, and ensure the silo is at a safe inventory level (typically 40–60% full is the most stable configuration for wind loading). Post-storm, inspect anchor bolts and shell deformation within 24 hours.
Q: Can I repair a corroded silo shell by welding new steel over the damaged area?
Yes, but with conditions. The existing steel must have a minimum remaining thickness of 50% of original — otherwise the heat from welding will cause further degradation. The patch plate should overlap the damaged area by at least 50mm on all sides, be the same thickness or thicker than the original, and be joined with a continuous fillet weld (minimum 6mm leg for plates up to 10mm thick). After welding, clean and coat the repaired area to match the surrounding coating system. For structural repairs — meaning the corrosion has reduced the shell's load-bearing capacity — you need a structural engineer's sign-off before returning the silo to service.
Protect Your Silo Investment with Manxing
Weather damage to industrial silos isn't a matter of if — it's a matter of when and how severe. The difference between a silo that lasts 30 years and one that needs major repair at year eight comes down to design decisions made before the first plate is lifted: the right coating system, the right drainage detail, the right wind loading calculation for your specific site.
At Manxing, we've designed, built, and repaired silo systems across 30+ countries — from typhoon zones in Southeast Asia to desert environments with 40°C daily temperature swings. Every project starts with a site-specific environmental assessment, not a generic specification. We don't hand you a datasheet and wish you luck. We engineer for your weather, your material, and your operating conditions.
Contact our engineering team for a free site-specific weather risk assessment for your silo project. We'll review your location data, identify the specific weather threats to your structure, and provide a prevention strategy with actual numbers — coating thicknesses, drainage capacities, wind loads, and cost estimates. No generic advice. No sales pitch. Just engineering.
Visit ManxingStorage.com or email our project team directly to schedule your assessment.