
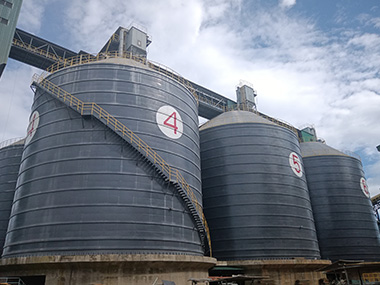

Silo Project Timeline: From Order to Commissioning — What Actually Happens and How Long It Takes
A typical industrial silo project runs 24 to 32 weeks from signed order to commissioning. That's for a single 2,000–5,000 tonne capacity silo with standard accessories. The timeline stretches when you're dealing with multi-silo clusters, seismic zones, or sites where the monsoon hits mid-construction. Here's what actually happens in those weeks — not the sanitized version, but the real sequence with the delays nobody puts in the brochure.
Phase 1: Engineering & Design (Weeks 1–8)
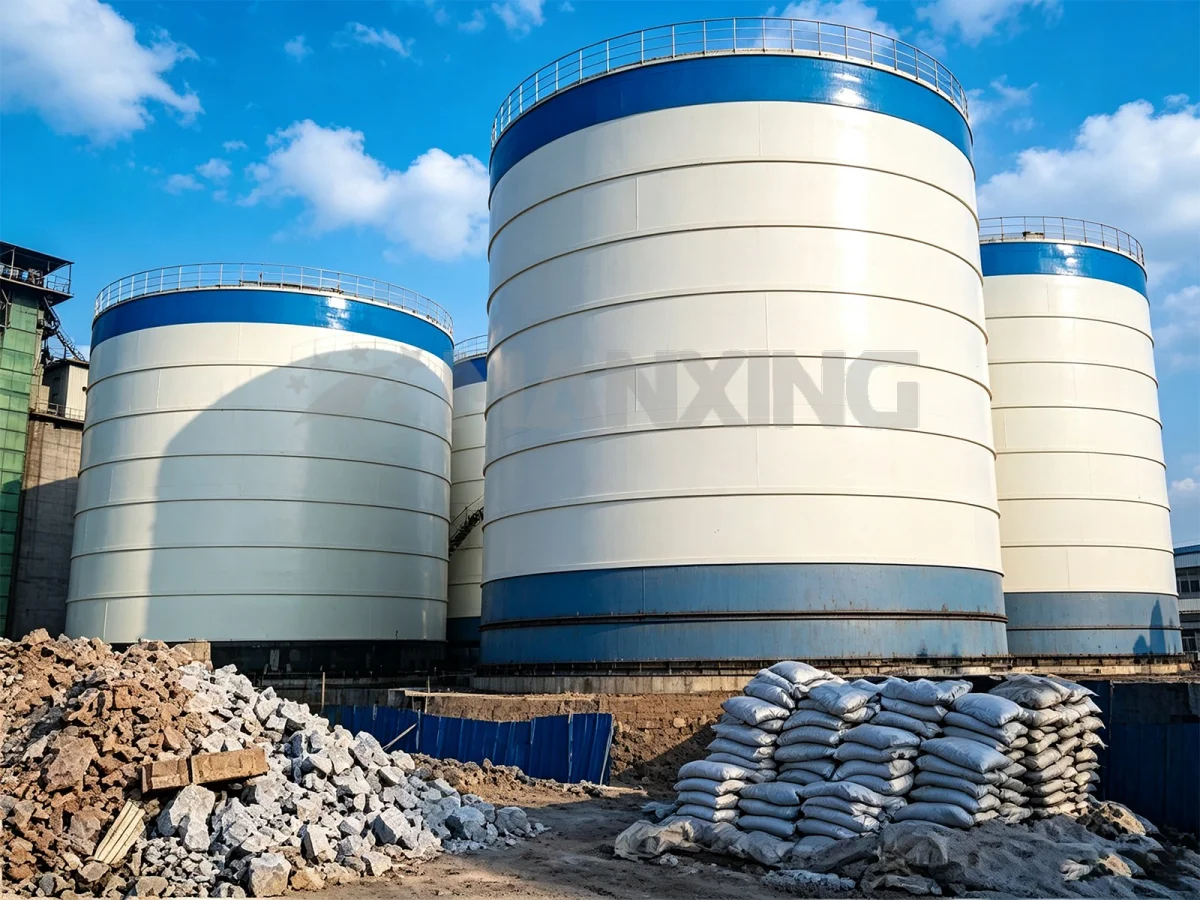
This is where the project lives or dies. I've seen procurement and fabrication run perfectly, then the whole thing stalls because the engineering package had a flaw nobody caught until the steel was already cut. That's expensive. That's embarrassing. And it's preventable.
Geotechnical Investigation and Foundation Design
Before anyone draws a single silo wall panel, you need to know what's under the ground. A proper geotechnical survey — boreholes to at least 15 meters, standard penetration tests every 1.5 meters, lab testing on undisturbed samples — takes 2 to 3 weeks if the drilling crew is available. In remote sites, I've waited 5 weeks just for the rig to show up.
The foundation design depends entirely on what those boreholes reveal. A silo carrying 4,000 tonnes of cement exerts a bearing pressure of roughly 180–220 kPa at the foundation level. If the soil can't handle that — say you hit soft clay with an allowable bearing capacity of only 80 kPa — you're looking at piled foundations. That adds 3 to 4 weeks to the timeline and $40,000–$80,000 to the cost, depending on pile depth and diameter.
We follow Eurocode 7 (EN 1997) for geotechnical design and the local building code for seismic parameters. In high-seismic zones — Indonesia, Chile, parts of China — the foundation often ends up being the most expensive single component. I worked a project in Sulawesi where the foundation cost exceeded the silo steel itself. The client wasn't happy, but the alternative was a silo that wouldn't survive the next earthquake.
Process Design and Silo Configuration
Process design answers the questions that determine everything else: What material? What flow rate? What aeration system? What dust filtration? A cement silo and a coal silo might look similar from the outside, but the internals are completely different. Coal needs inertization, explosion venting per EN 14491, and temperature monitoring. Cement needs fluidization pads, a bin activator at the discharge, and a baghouse sized for the filling air volume.
The filling rate drives the dust collector sizing. A typical pneumatic conveying system delivers cement at 80–120 tonnes per hour. That generates roughly 2,500–4,000 m³/h of air that needs filtering. Undersize the baghouse and you'll blow dust out the relief valves every time the silo fills. I've seen it happen — a plant in Vietnam where the baghouse was sized for 2,000 m³/h on a system delivering 3,500. The roof was coated in cement dust within a month.
Discharge configuration matters too. Mass flow versus funnel flow. Central discharge versus side discharge. Each choice affects the silo height, the hopper geometry, and the structural loads. We run the calculations per Eurocode 1 Part 4 (EN 1991-4) for silos and tanks, which gives you the patch loads, the horizontal loads during filling and discharge, and the buckling checks for the shell.
Structural and Mechanical Engineering
This is where the 3D model becomes a set of fabrication drawings. For a welded silo, that means shell plate layouts with weld seam positions, stiffener schedules, roof truss details, and ladder/guardrail layouts. For a bolted silo, it's bolt hole patterns, gasket specifications, and torque sequences.
The structural check isn't just "will it hold the material." It's wind load per EN 1991-1-4, seismic load per EN 1998-1, thermal load (a silo in direct sun in the Middle East sees a 40°C temperature differential between the sun-facing and shade-facing walls), and buckling under eccentric discharge. The shell buckling check per EN 1993-1-6 is particularly unforgiving — a 2 mm deviation in shell thickness can drop the critical buckling stress by 15–20%.
Engineering review and client approval typically takes 2 weeks. If the client's engineering team is responsive. If they're not, this phase can stretch to 6 weeks while drawings sit in someone's inbox. I've learned to schedule a formal review meeting at week 4, not an email. It forces decisions.
Phase 2: Procurement & Fabrication (Weeks 6–20)
Procurement and fabrication overlap with engineering — you don't wait for every drawing to be approved before ordering steel. That would add 4 weeks to the project. The trick is sequencing: order the long-lead items first (shell plates, structural sections, the dust collector, the aeration blower), then detail items once the design is frozen.
Steel Procurement and Quality Control
Shell plates for a 4,000-tonne cement silo — say 16 meters diameter, 22 meters high — weigh roughly 45–55 tonnes. That's about 25–30 individual plates, each 6–8 meters wide and 1.8–2.4 meters tall. We source from mills that can provide EN 10025 S355J2 or equivalent, with full mill certificates (EN 10204 Type 3.1).
Quality control starts at the mill. Chemical composition, mechanical properties, ultrasonic testing for laminations. Then it continues at the fabrication shop — dimensional checks on each plate, edge preparation verification, and weld procedure qualification per EN ISO 15614. I've rejected entire plate deliveries because the Charpy impact test came back 5 J below spec. The mill argued. I had the test reports. The plates went back.
Lead time for structural steel is typically 4–6 weeks from order to delivery at the fabrication shop. Shell plates with specific thickness and width requirements can take 8–10 weeks if the mill needs to schedule a dedicated rolling. Plan for this. Don't assume steel is sitting in a warehouse waiting for you.
Manufacturing and Shop Assembly
Fabrication is where the silo takes physical form. For welded silos, the shell plates are rolled to the correct curvature, then welded into ring sections — typically 1.8 to 2.4 meters tall per ring. Each ring is shop-assembled to verify diameter, ovality, and weld quality. Ovality tolerance is typically ±5 mm on diameter for a 16-meter silo. Beyond that, the shell won't stack properly during erection.
Bolted silos are different. The plates are pressed or rolled, then drilled — not welded — with bolt holes at precise spacing. Hole tolerance is critical: ±1 mm on hole position, ±0.5 mm on hole diameter. A bolted silo with 1,200 bolts in the shell alone doesn't forgive sloppy drilling. I've seen a crew spend an entire day re-drilling holes on-site because the shop got the spacing wrong by 3 mm. That's a day nobody budgeted for.
Shop fabrication for a single silo takes 6–8 weeks. For a cluster of three silos, it's 10–12 weeks — not triple, because you're running parallel workstations, but the sequencing gets complex.
Shipping and Logistics
This is the phase that catches people off guard. A 16-meter-diameter silo shell doesn't fit in a standard container. It goes flat-deck or as nested plates on an open-top container. For overseas shipment, you're looking at 40-foot flat racks, and the loading plan matters — you need the plates to arrive in erection sequence, not random order.
Sea freight from China to West Africa takes 35–45 days. To South America, 25–35 days. To Southeast Asia, 7–14 days. Add 5–7 days for customs clearance at the destination, assuming your documentation is perfect. I've seen a shipment held up for 12 days in Lagos because the packing list didn't match the bill of lading. The crew was on-site, ready to erect, sitting idle. That's $2,000–$3,000 per day in standby costs for a typical erection crew.
Overland transport from port to site is its own challenge. A 50-tonne shell ring on a low-bed trailer needs a route survey — bridge weight limits, overhead clearances, road width. In rural areas, I've had to widen a 300-meter stretch of road just to get the trailer through. Budget for it. It's not optional.
Phase 3: Site Preparation & Foundation (Weeks 10–18)
Civil works start as soon as the geotechnical report is approved and the foundation drawings are released. This phase runs in parallel with fabrication — the steel is being built while the concrete is being poured. That's how you keep the overall timeline at 28 weeks instead of 40.
Civil Works and Foundation Pouring
A ring-beam foundation for a 16-meter silo requires roughly 80–120 m³ of concrete, depending on soil conditions and seismic requirements. The ring beam is typically 600–800 mm wide and 800–1,200 mm deep, reinforced with high-yield bars at 150–200 mm spacing. We specify concrete strength at C30/37 minimum — anything less and the anchor bolts won't develop their full pullout capacity.
The pour itself is straightforward. The curing is not. Concrete needs 7 days at minimum above 10°C to develop 70% of its design strength. In cold climates, that means insulation blankets or heated enclosures. In hot climates — I'm talking 45°C in Rajasthan — you need to prevent the surface from drying too fast, which means wet burlap and continuous watering for 5 days. Skip this step and you get surface cracking that looks cosmetic but lets moisture into the reinforcement.
Foundation level tolerance is ±3 mm over the entire circumference. That's tight. We use a total station to survey every anchor bolt position before the concrete sets. If a bolt is off by 10 mm, the base ring won't sit flat, and you're looking at shimming or — worse — re-drilling epoxy anchors after the fact.
Anchor Bolt Installation and Base Ring Preparation
Anchor bolts are the connection between the silo and the foundation. For a 16-meter cement silo, we typically use 32–48 M24 or M30 anchor bolts, each embedded 500–700 mm into the concrete. The bolt pattern is laid out on a template — a steel ring that holds every bolt in position during the pour.
The base ring — the first ring of the silo shell — sits on these bolts. It's shimmed to level, then the nuts are torqued to spec. For M30 Grade 8.8 bolts, that's typically 600–800 Nm. We use a calibrated torque wrench and mark each bolt after torquing. I've seen crews skip the marking step, then three months later nobody knows which bolts were actually tightened. That's how you get a silo that's missing 40% of its anchor bolt preload.
After the base ring is set, we apply the bituminous coating or epoxy grout between the ring and the foundation. This seals the joint and distributes the load evenly. Grout strength needs to reach 30 MPa before we start stacking shell rings above. That's another 3–5 days of waiting.
Phase 4: Erection & Assembly (Weeks 16–28)
This is the phase everyone pictures when they think "silo construction." Cranes, welding arcs, crews working at height. It's also the phase where weather stops you dead.
Welded vs. Bolted Construction
Welded silos are built ring by ring, starting from the top. The roof and top ring are assembled on the ground, then lifted as a unit. Each subsequent ring is welded to the one above it. A crew of 6–8 welders can complete one ring per day under good conditions — that's 1.8 to 2.4 meters of shell height per day.
Total erection time for a 22-meter-tall welded silo is roughly 10–14 working days, assuming the crane is positioned correctly and the weather cooperates. Wind above 35 km/h stops hot work. Rain stops everything. I was on a site in Guangdong where a typhoon sat over us for 4 days. The crew did nothing but secure the site and wait. That's 4 days off the schedule with zero recovery possible.
Bolted silos are faster — a crew of 4–6 can erect 3–4 rings per day because there's no welding, no weld inspection, and no grinding. The trade-off is the bolt torque sequence. Every bolt must be tightened in a specific pattern — star pattern, working from the center outward — to ensure even gasket compression. Skip the sequence and you get leaks. I've seen a bolted silo leak rainwater through 200 bolt holes because the crew tightened in rows instead of a star pattern. Took two days to re-torque the entire shell.
Lifting and Stacking
The crane is the critical resource. For a 16-meter silo with 50 tonnes of steel, you need a crane with at least 80-tonne capacity at the required radius. The shell rings are lifted with a four-point spreader beam — typically 4 slings at 90° spacing. Each ring weighs 2–4 tonnes, so the crane isn't the constraint. The constraint is the rigging time — attaching slings, lifting, positioning, detaching. That's 15–20 minutes per ring.
We use a crawler crane when the site allows it — more stable, doesn't need outriggers, can move around the silo. When space is tight, a mobile crane with outriggers. I've used a 200-tonne mobile crane on a site in urban Jakarta where the silo was 8 meters from an existing building. The crane sat on one side and reached over the adjacent structure. The lift plan took two days to engineer and 30 minutes to execute. That's normal.
Safety at height is non-negotiable. Every erector wears a full-body harness with a double lanyard. We install temporary guardrails on each ring as it's placed. The crew does a toolbox talk every morning — 10 minutes, covering the day's lifts, the wind forecast, and the emergency procedures. I've stopped work twice because the wind picked up mid-morning. Both times the crew grumbled. Both times I'd make the same call again.
Conveyor and Accessory Installation
Once the shell is complete, the internals go in. The aeration pads (for cement or fly ash), the level indicators, the pressure relief valve, the dust collector on the roof. The dust collector is usually the heaviest single component after the shell — a baghouse for a 4,000-tonne silo weighs 1.5–2.5 tonnes and sits on a 2-meter-high roof platform.
The conveyor — whether it's a pneumatic pipeline, a bucket elevator, or a belt conveyor — connects to the silo inlet and outlet. Pneumatic connections are straightforward: bolt the pipe flanges, check the gasket, torque the bolts. Bucket elevators need alignment — the head pulley, the boot pulley, and the silo inlet must be within 2 mm of plumb. I've seen an elevator installed 5 mm out of plumb. The belt tracked to one side within a week and wore a groove into the casing. Had to re-align the entire boot section.
Electrical and instrumentation — level switches, temperature sensors, aeration blower controls, dust collector pulse valves — typically takes 3–5 days for a single silo. The wiring runs from the field instruments to the local control panel, then to the plant DCS. We test every instrument individually before commissioning: simulate a high-level alarm, verify the dust collector pulse sequence, check the aeration blower pressure switch.
Phase 5: Commissioning & Handover (Weeks 26–32)
Commissioning is where you prove the silo does what the contract says it does. Not what you hope it does. What the contract says.
Pre-commissioning Checks
Before any material goes into the silo, we run through a checklist that's typically 80–120 items. Every bolt torqued and marked. Every weld visually inspected (and spot-checked with dye penetrant per EN ISO 17636). Every instrument loop-tested. Every safety device — pressure relief valve, high-level alarm, emergency stop — functionally verified.
The pressure relief valve is critical. For a cement silo, it's typically set to open at 15–20 kPa. Too low and it opens during normal filling, dumping dust everywhere. Too high and the shell buckles before the valve opens. We test it with a calibrated pressure source, not by guessing. I've seen relief valves that were painted shut from the factory. They wouldn't open at 50 kPa. That's a bomb, not a safety device.
The dust collector gets a full functional test: blower start, pulse valve sequence, differential pressure reading, filter media inspection. We run it for 2 hours minimum, monitoring the differential pressure. A clean filter bank should read 200–400 Pa. If it's above 800 Pa on a new installation, something's wrong — maybe the filter bags are coated with shipping dust, or the pulse air pressure is too low.
Load Testing and Performance Verification
Load testing means filling the silo with actual material — or water, if material isn't available. We fill to 50%, check the foundation settlement (should be less than 5 mm for a properly designed foundation), then fill to 75%, then to 100%. At each level, we measure shell deflection, anchor bolt strain, and discharge flow rate.
The discharge test is the real proof. We open the discharge valve and measure the flow rate. For a cement silo with a fluidization system, you should get 80–120 tonnes per hour at the outlet. If you're getting 40, the aeration pads aren't working — maybe the blower is undersized, maybe the pads are clogged, maybe the air distribution manifold is blocked. We troubleshoot on the spot. I've spent an entire afternoon tracing a blockage in an aeration line that turned out to be a rag left inside during fabrication. Embarrassing for the shop. Expensive for the schedule.
We also verify the material flow pattern. For a mass-flow silo, the material should discharge from the bottom first, then progressively upward. We check this with tracer methods — dropping a small amount of colored material at the surface and timing its appearance at the outlet. If the material channels or rat-holes, the hopper geometry or aeration system needs adjustment.
Documentation and Training
Handover isn't just handing over the keys. It's a package: as-built drawings, material certificates, weld inspection reports, bolt torque records, instrument calibration certificates, operation and maintenance manuals, and a spare parts list. For a single silo, that's typically 200–300 pages of documentation.
We also train the plant's operations and maintenance staff — usually 2 days of classroom and hands-on training. How to read the level indicator. How to change the dust collector filter bags. What to do if the high-level alarm sounds. How to inspect the shell for corrosion. I've done this training in Chinese, English, Spanish, and once in Bahasa Indonesia through an interpreter. The interpreter got the technical terms wrong twice. I switched to English and drew diagrams instead.
The final sign-off is a punch list walkthrough. We walk the silo with the client, note every item that needs touch-up — a scratched paint area, a missing bolt cap, a label that's peeling. We agree on a completion date for punch list items, typically 2–4 weeks after the walkthrough. Then the warranty period starts — usually 12 months from commissioning.
Case Study: 3 × 5,000-Tonne Clinker Silos — Shandong Province, China
A cement plant in Shandong ordered three 5,000-tonne clinker silos with a 28-week delivery requirement. Clinker is abrasive — 25–35 MPa hardness, 1,400°C discharge temperature — so the silos needed abrasion-resistant liners in the hopper sections and thermal expansion joints in the shell.
Engineering took 7 weeks instead of 6 because the client changed the discharge configuration from central to side discharge at week 3. That meant re-running the EN 1991-4 load calculations and re-drawing the hopper geometry. We absorbed the delay by overlapping steel procurement with the revised engineering — ordered the shell plates before the hopper design was finalized, since the shell dimensions hadn't changed.
Fabrication ran 11 weeks. The abrasion-resistant liners — 10 mm thick Mn13 steel — added 2 weeks because the liner supplier had a backlog. We shifted the schedule: fabricated the shell first, then installed the liners as the hoppers came off the shop floor. The silos shipped in three batches, one per week, matching the erection sequence.
Erection took 14 weeks. The site was 800 meters from an active clinker cooler, so dust was constant. The welding quality suffered — porosity in the shell welds from wind-blown dust. We erected temporary wind shields around each ring during welding, which added 3 days per silo but brought the weld rejection rate from 12% down to 2%.
Commissioning revealed a problem: the clinker was hotter than expected — 180°C at the silo inlet instead of the design 120°C. The thermal expansion joints handled it, but the dust collector filter bags — rated to 150°C — started degrading. We replaced them with PTFE bags rated to 260°C. That was a $15,000 change order the client accepted without argument, because the alternative was a dust collector that failed within 6 months.
Total project duration: 30 weeks. Two weeks over the original target, but the client was satisfied because we communicated the delays early and didn't hide behind the contract.
Frequently Asked Questions
Q: Can the timeline be compressed to 20 weeks?
Yes, but only if you accept trade-offs. You can compress engineering to 4 weeks by using a standard design with minimal customization. You can compress fabrication to 6 weeks by paying a 15–25% premium for expedited mill rolling. You can compress erection to 8 weeks by running two shifts. But you can't compress concrete curing, and you can't compress shipping across an ocean. The realistic floor for a custom silo is 22 weeks. Below that, you're gambling.
Q: What causes the most delays in silo projects?
Three things, in order: engineering changes after fabrication has started (adds 3–6 weeks), foundation re-work due to unexpected soil conditions (adds 2–4 weeks), and shipping delays (adds 1–3 weeks). Weather during erection is a factor, but it's usually recoverable within the float period. The big delays come from decisions that should have been made earlier.
Q: When should the client's operations team get involved?
At the engineering review, not at commissioning. I've seen plants where the operations team saw the silo for the first time on commissioning day. They didn't understand the aeration system, didn't know how to read the level indicator, and couldn't troubleshoot the dust collector. That's a recipe for a silo that's technically commissioned but practically useless. Get the operators involved at week 4, during the 3D model review. They'll catch things the engineers miss — like the fact that the maintenance platform is 300 mm too narrow for the filter bag cart.
Ready to Start Your Silo Project?
Every silo project has its own timeline — driven by capacity, material, site conditions, and how fast decisions get made. At Manxing, we've delivered silo EPC projects across 30+ countries, from 500-tonne fly ash silos to 20,000-tonne clinker storage. We handle the full scope: engineering, procurement, fabrication, erection, commissioning, and training.
If you're planning a silo installation and want a realistic timeline — not a sales pitch — reach out to our engineering team. We'll give you a week-by-week schedule based on your actual site conditions, not a template.